Warm afternoons when the sun is shining and the humidity hasn’t creeped up on us yet means packing a picnic and getting out in that soft grass and sunshine! Sushi is one of my favorite foods and figuring out that it is EASY to make has been a game changer. This means you can put exactly what you want in it and it certainly saves a few dollars.
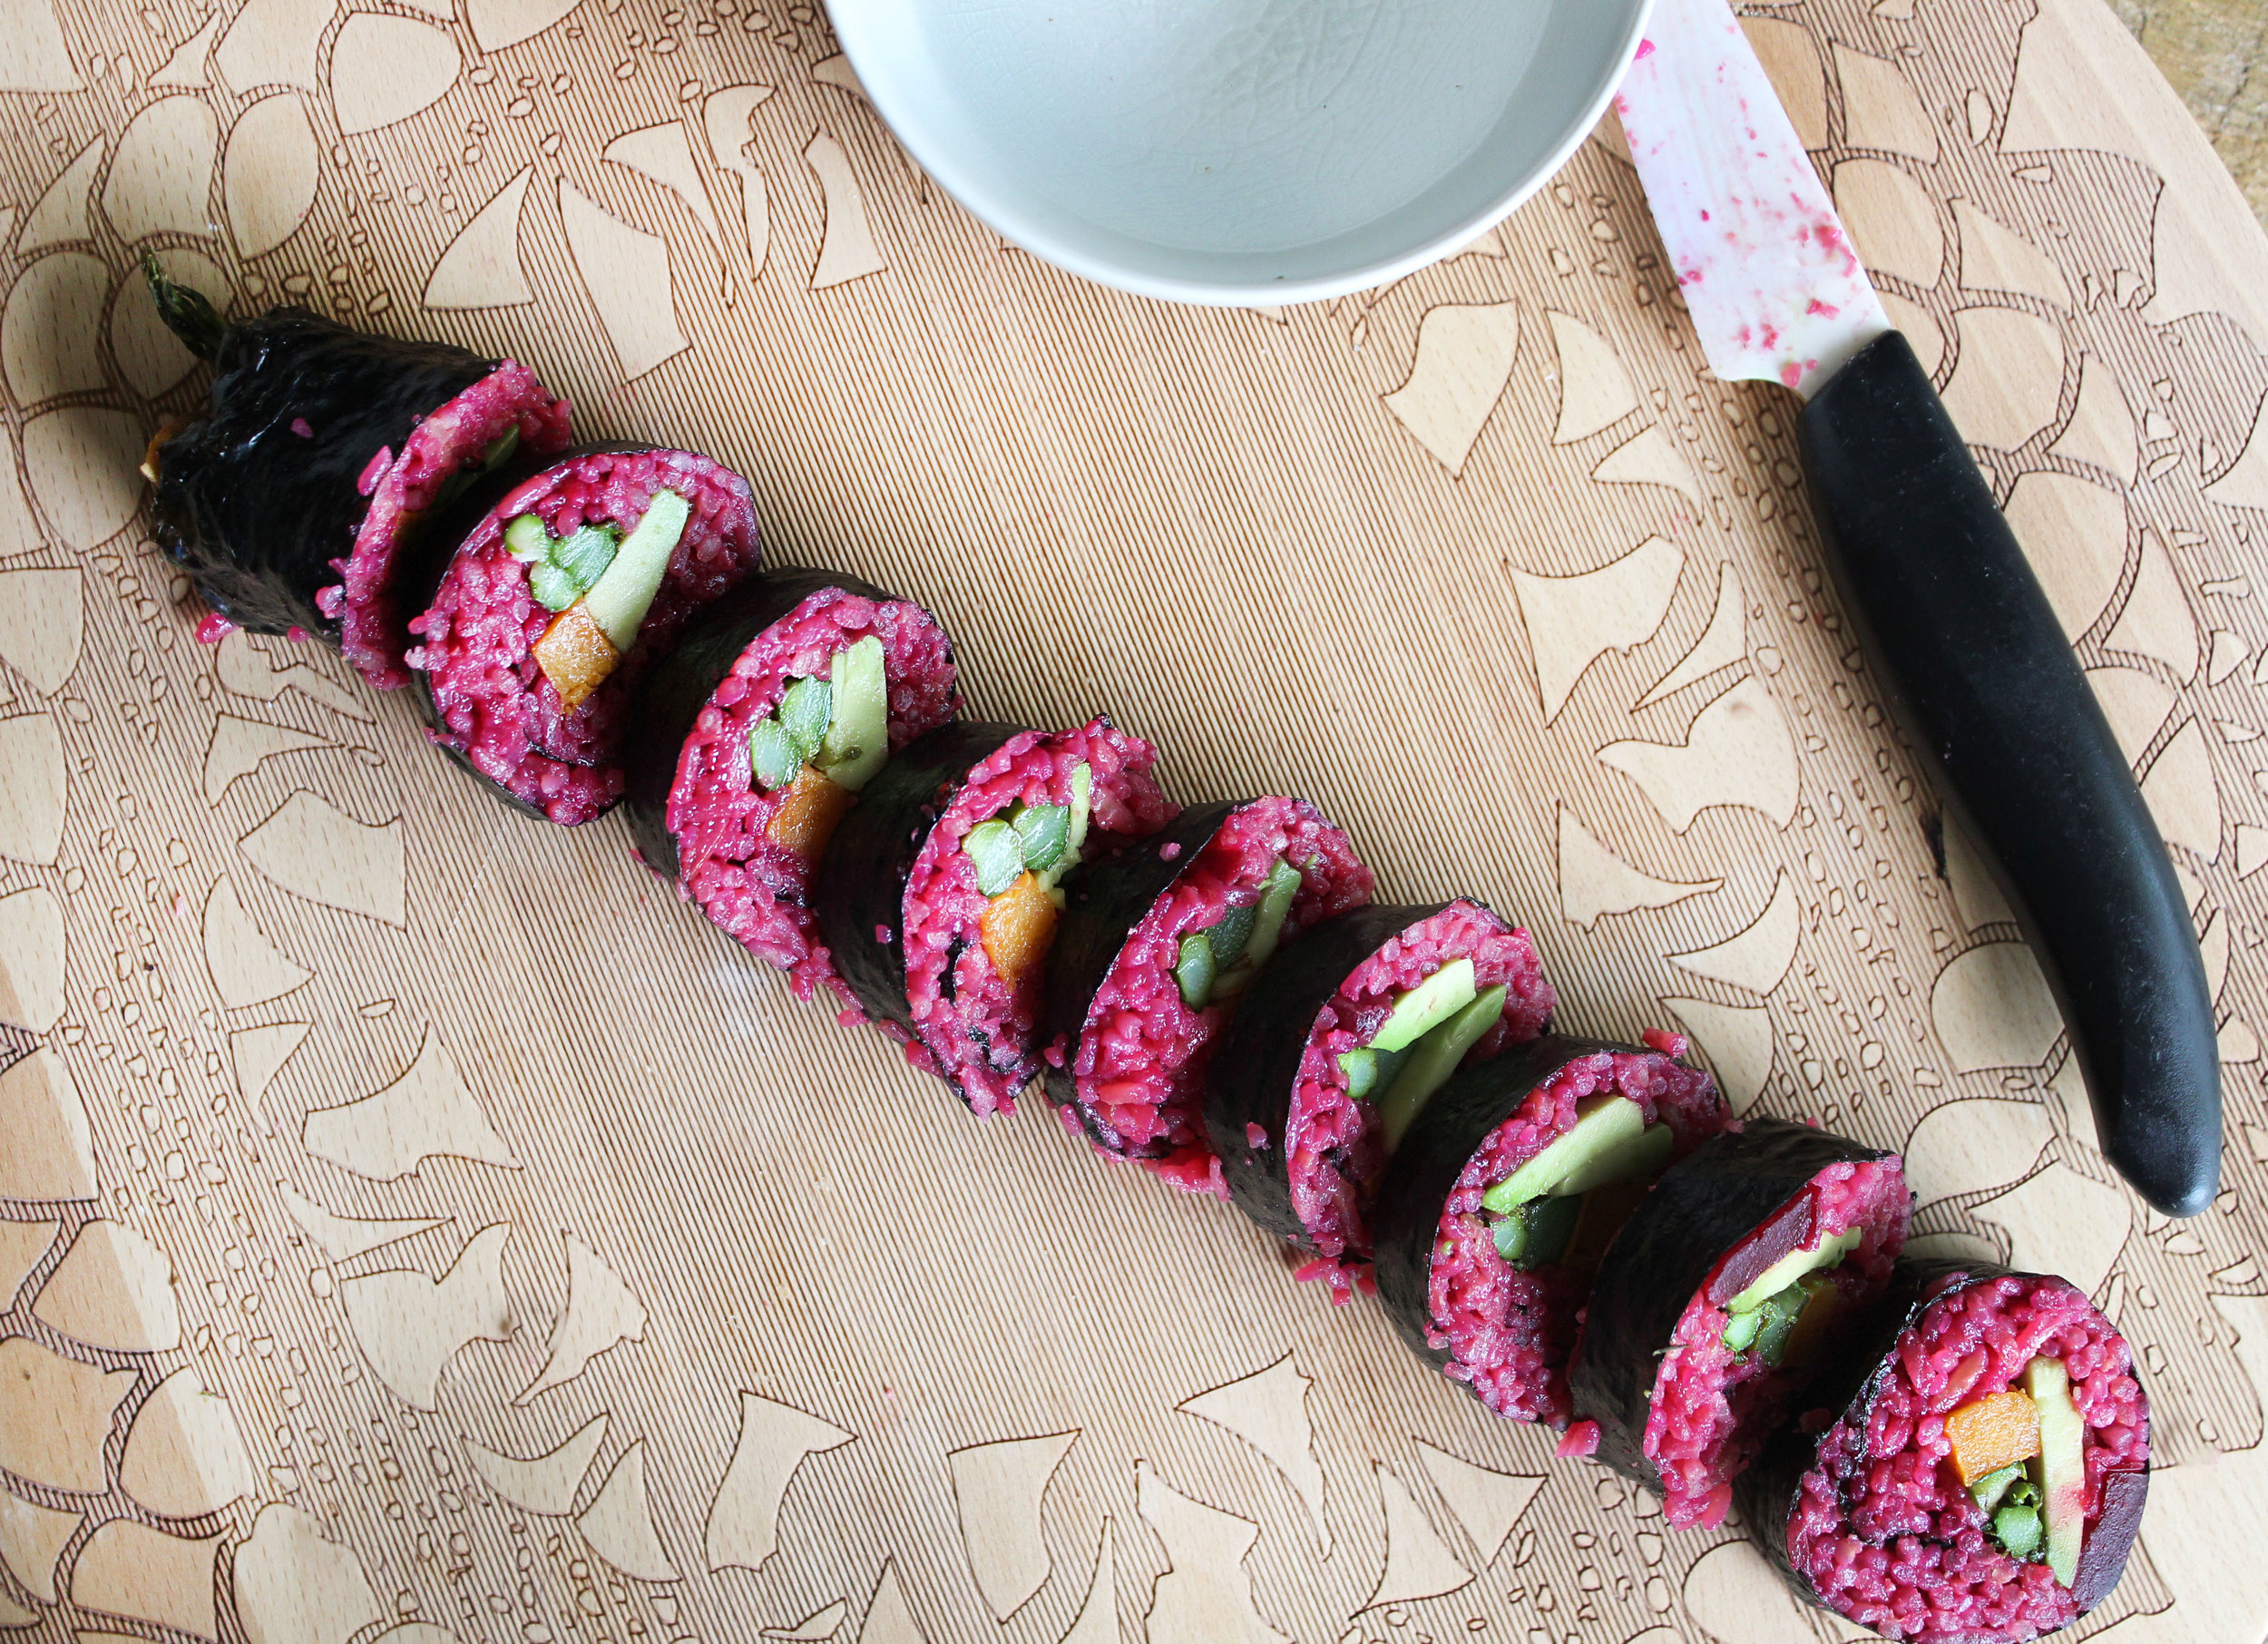
This spring sushi is just the prettiest thing. I am swooning over the color combo of the beet rice and the green asparagus & avocado. SO. PRETTY!
For those of you who are not beet lovers (what is wrong with you?!) don’t worry, you really can not taste the beet in the rice but you could always forgo the beet juice but that means forgoing the gorgeous color it provides!
For those of you wondering “but don’t I need one of those sushi rolling mats?” nope, not at all! Just use your hands! It’s that simple.
Ok, let’s get into it so you can get on with your picnic!
Makes 2 sushi rolls about 18 pieces.
Ingredients:
- 1 cup jasmine rice (or sushi rice)
- 2 cups water
- 1 raw beet juiced
- 1 avocado
- ½ sweet potato
- 1 tsp olive oil
- About 6 sprigs of asparagus
- 1 tsp rice vinegar
- 1 tsp sugar
- ½ tsp salt
- 2 sheets of nori (can be found in international aisle of grocery store)
The Process:
1. Cook your rice according to the instructions on the bag.
2. While rice is cooking preheat oven to 450 degrees. Chop you sweet potato into matchsticks (or a little larger) and toss them in a baking dish with the asparagus and olive oil.
3. Roast for about 15 minutes, or until potatoes can be pierced with a fork.
4. Once rice is fully cooked pour in beet juice and stir so that all of it is stained pink.
5. Add the rice vinegar, sugar and salt to rice and stir. Set aside.
6. Halve, peel and slice avocado into thin segments.
7. Get a small bowl of water and place it near your sushi rolling station. Place one sheet of nori on a cutting board. Take half of the beet rice and put it on your nori, spreading out so there is an even layer about ¼ inch thick of rice. Leave about 1 inch of space on the nori with no rice, this is how the sushi will stick together. (See picture for reference.)
8. Add veggies to the bottom ¼ of your nori sheet, on top of the rice. (Again, see picture for reference.)
9. Now, simply roll her up! Start at the bottom, roll starting with tucking all the veggies under at once. The first “roll” is the trickiest because you are dealing with the bulk of the veggies. Just think like you would if you were to roll a burrito! Now, continue rolling TIGHTLY until the whole thing is rolled up. Make sure it is tight! You can squeeze pretty hard because this presses everything together. Use the water to seal the two nori pieces together simply by dipping your fingers in it and “painting” it on to fuse together.
10. Now that we have our roll use a very sharp knife to cut into pieces, about 1 inch thick! Each roll should give you about 9 pieces.
11. Serve with tamari, wasabi, sriracha whatever you like!
12. Enjoy!